第8章 私服nexus
本章详细介绍了nexus的安装过程,设置maven从私服下载构件,以及发布构件至nexus。
8.1 什么是nexus
nexus是一个web版的仓库管理软件
8.2 nexus安装
nexus安装非常简单。
下载地址:http://www.sonatype.org/nexus/go
本文以Linux环境为例,安装nexus:
- 首先在/usr/local下建nexus目录
- 将下载的zip包解压,将其中的nexus-2.11.4-01解压至nexus如图:

- 进入bin目录,将nexus设置为可执行权限:
cd bin
chmod +x nexus

设置root可执行nexus
默认的nexus是不让root用户直接启动的,会报出如下错误WARNING - NOT RECOMMENDED TO RUN AS ROOT
If you insist running as root, then set the environment variable RUN_AS_USER=root before running this script.
需要设置root执行权限export set RUN_AS_USER=root
此语句仅临时设置root变量,重启linux后会无效,如需持久设置,需要修改环境变量,见以下步骤。
- 此时执行
./nexus start即可启动nexus。

- 停止nexus
./nexus stop

- 配置环境变量,设置开机启动
- 设置环境变量:
vim /etc/profile
在最后一行添加export set RUN_AS_USER=root

- 设置开机启动
进入到配置目录:
cd /etc/init.d
复制脚本cp /usr/local/nexus/bin/nexus nexus
添加系统服务:chkconfig --add nexus
设置启动级别为345:chkconfig --levels 345 nexus on
查看是否添加成功:chkconfig --list|grep nexus,如图

- 修改脚本
vim /etc/init.d/nexus
第一行添加:RUN_AS_USER="root"
然后,将NEXUS_HOME=".."修改为NEXUS_HOME="/usr/local/nexus"
如图:
- 重启Linux
reboot - 访问地址:
http://<LinuxIP>:8081/nexus/#welcome
注意:重启Linux需要一段时间,不断刷新此地址即可。
查看nexus是否启动,`ps –ef|grep nexus`。

8.3 nexus仓库设置
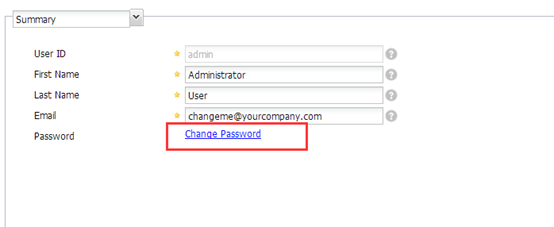
8.3.1 登录系统,修改密码
nexus默认的管理员密码是admin/admin123,为了安全起见,第一件事就是上来修改管理员密码。


8.3.2 nexus内置仓库介绍
1、 仓库类型介绍

| 仓库类型 | 介绍 |
|---|---|
| group | 仓库组 |
| hosted | 宿主仓库 |
| proxy | 代理仓库 |
| virtual | 虚拟仓库 |
2、 仓库介绍
| 仓库 | 介绍 |
|---|---|
| 3rd party | 这是一个策略为Releases的宿主仓库,用来部署无法从公共仓库获得的第三方发布版本构件 |
| Apache Snapshots | 这是一个策略为Snapshots的代理仓库,用来代理ApacheMaven仓库的快照版本构件 |
| Central | 这是一个策略为Releases的代理仓库,用来代理maven中央仓库中发布的版本构件 |
| Central M1 shadow | 这是一个策略为Releases的虚拟仓库,用来提供中央仓库中M1格式的发布版本的构件 |
| Codehaus Snapshots | 这是一个策略为Snapshots的代理仓库,用来代理Codehaus Snapshots仓库的快照版本构件的仓库 |
| Releases | 这是一个策略为Releases的宿主仓库,用来部署管理内部的发布版本构件 |
| Snapshots | 这是一个策略为Snapshots的宿主仓库,用来部署管理内部的快照版本构件 |
8.3.3 索引
开启远程索引
一个新搭建的nexus,是一个空的仓库,nexus默认是关闭远程索引下载,打开步骤如图:注意:3个proxy类型的远程索引都需要打开

然后在3个proxy类型的仓库上,点击右键,Repair Index,nexus就会去下载远程的索引文件。

测试
在Browse Remote 中搜索任意jar

8.3.4 创建宿主仓库


8.3.5 仓库组设置
- 什么是仓库组?
仓库组是将多个仓库聚合成一个仓库地址,为maven提供服务。maven配置中,只需要配置仓库组的链接,即可同时得到多个仓库的构件。
仓库组中仓库的顺序决定了仓库组遍历其所含仓库的次序,所以应该将常用的仓库放在前面。
仓库组设置很简单:
点击type为group类型的仓库,configuration标签页中Ordered Group Repositories为当前组包含仓库,available repositories为可继续添加的仓库。

8.4 配置maven从私服下载构件
前面安装了nexus,目的就是让开发人员的maven链接私服下载构件。
修改maven配置文件setting.xml
找到profiles标签,设置代码:
1 | <profiles> |
这样配置,maven就可以从私服下载构件了,但是会有个问题,他还会时不时的请求中央仓库,如果想完全让maven访问nexus私服,需要设置镜像mirrors来支持。
8.5 maven的镜像配置
maven配置镜像后,所有的构件都只会从镜像服务器下载。
1 | <mirrors> |
8.6 发布构件至nexus
8.6.1 配置distributionManagement
发布仓库一般分为Releases版和snapshot版,所以要配置2个仓库地址
注意:这个是在项目的pom.xml中配置的
1 | <!-- 发布构件至私服nexus --> |
8.6.2 设置用户
配置好pom.xml后,需要指定发布用户,在setting.xml中设置:
1 |
|
设置完成,使用命令发布至nexus
mvn deploy

在nexus中查看
